

In this blog, we will see how to monitor log files, CPU, and memory utilization using the Amazon Cloudwatch agent.
For this use case, we will be using an Ubuntu-based EC2 instance. Installation of the Amazon Cloudwatch agent differs only based on the operating system, the rest of the steps are similar.
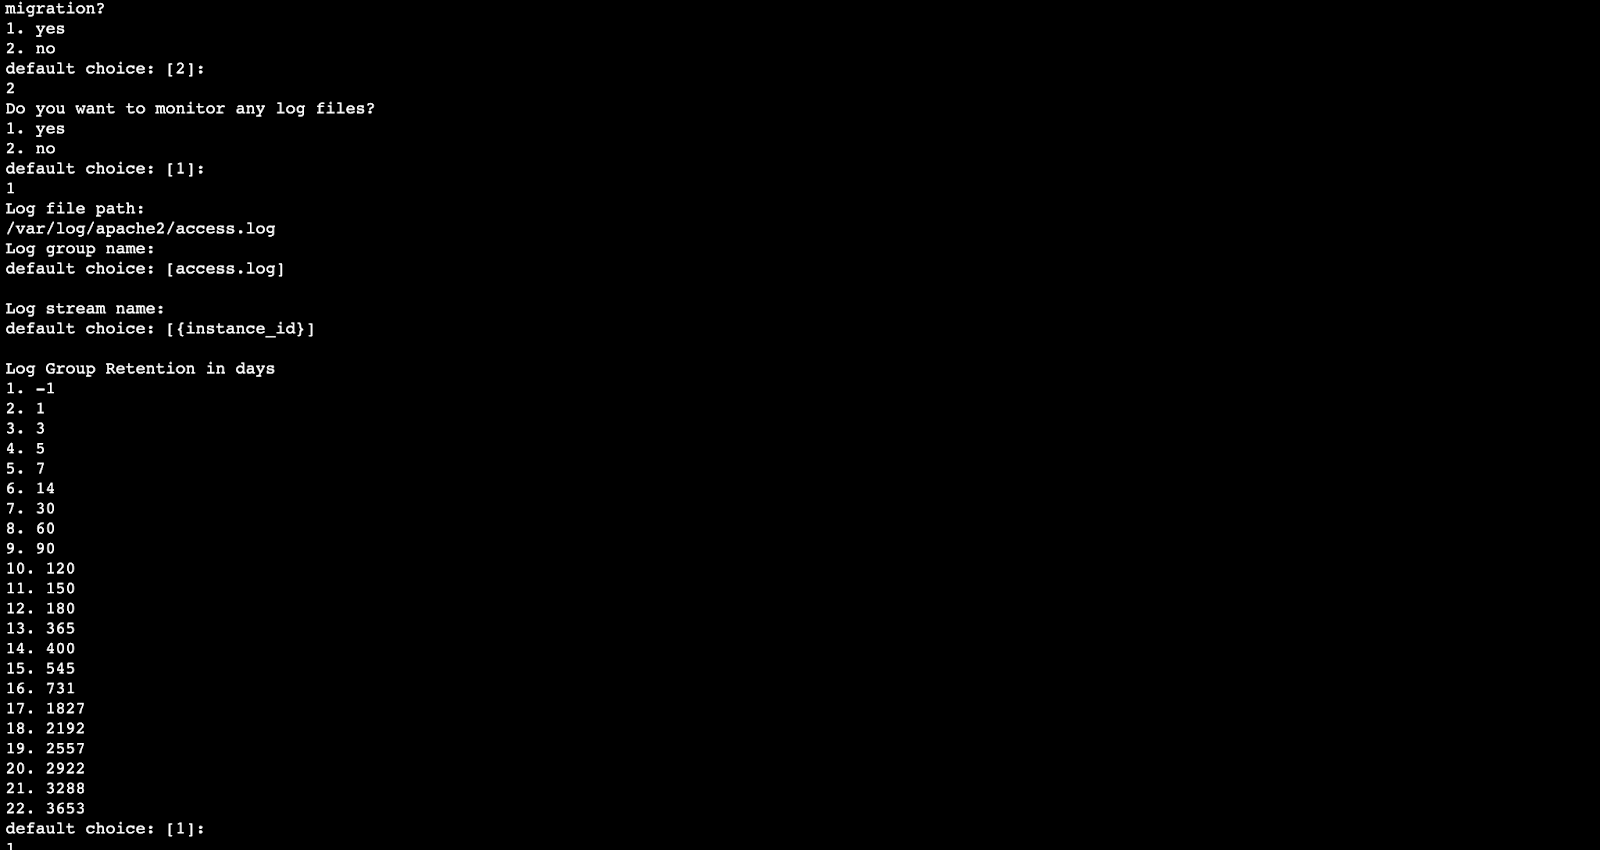
We will be monitoring the apache web server access log files which are located at /var/log/apache2 location
Step 1
Create an ec2 role for the cloudwatch agent and SSM access
Create a role for ec2 with the following two policies.
AmazonEC2RoleforSSM
CloudWatchAgentServerPolicy
Attach this role to the EC2 instance. This role will allow the cloudwatch agent to send logs to the cloudwatch service and also enable SSM access.
Step 2
Install the apache2 server on the instance
apt-get install apache2 -y
service apache2 start
service apache2 status
cat /var/log/apache2/access.log
Step 3
Download and install cloudwatch agent on your instance ( Docs )
Download the Cloudwatch agent .deb file from the following link.
https://s3.amazonaws.com/amazoncloudwatch-agent/ubuntu/amd64/latest/amazon-cloudwatch-agent.deb

Step 4
Install cloudwatch-agent by running the installation file
dpkg -i -E ./amazon-cloudwatch-agent.deb
Step 5
Start the amazon cloudwatch agent
/opt/aws/amazon-cloudwatch-agent/bin/amazon-cloudwatch-agent-ctl -m ec2 -a start
Step 6
Configure the cloudwatch agent using the wizard
/opt/aws/amazon-cloudwatch-agent/bin/amazon-cloudwatch-agent-config-wizard


Step 7
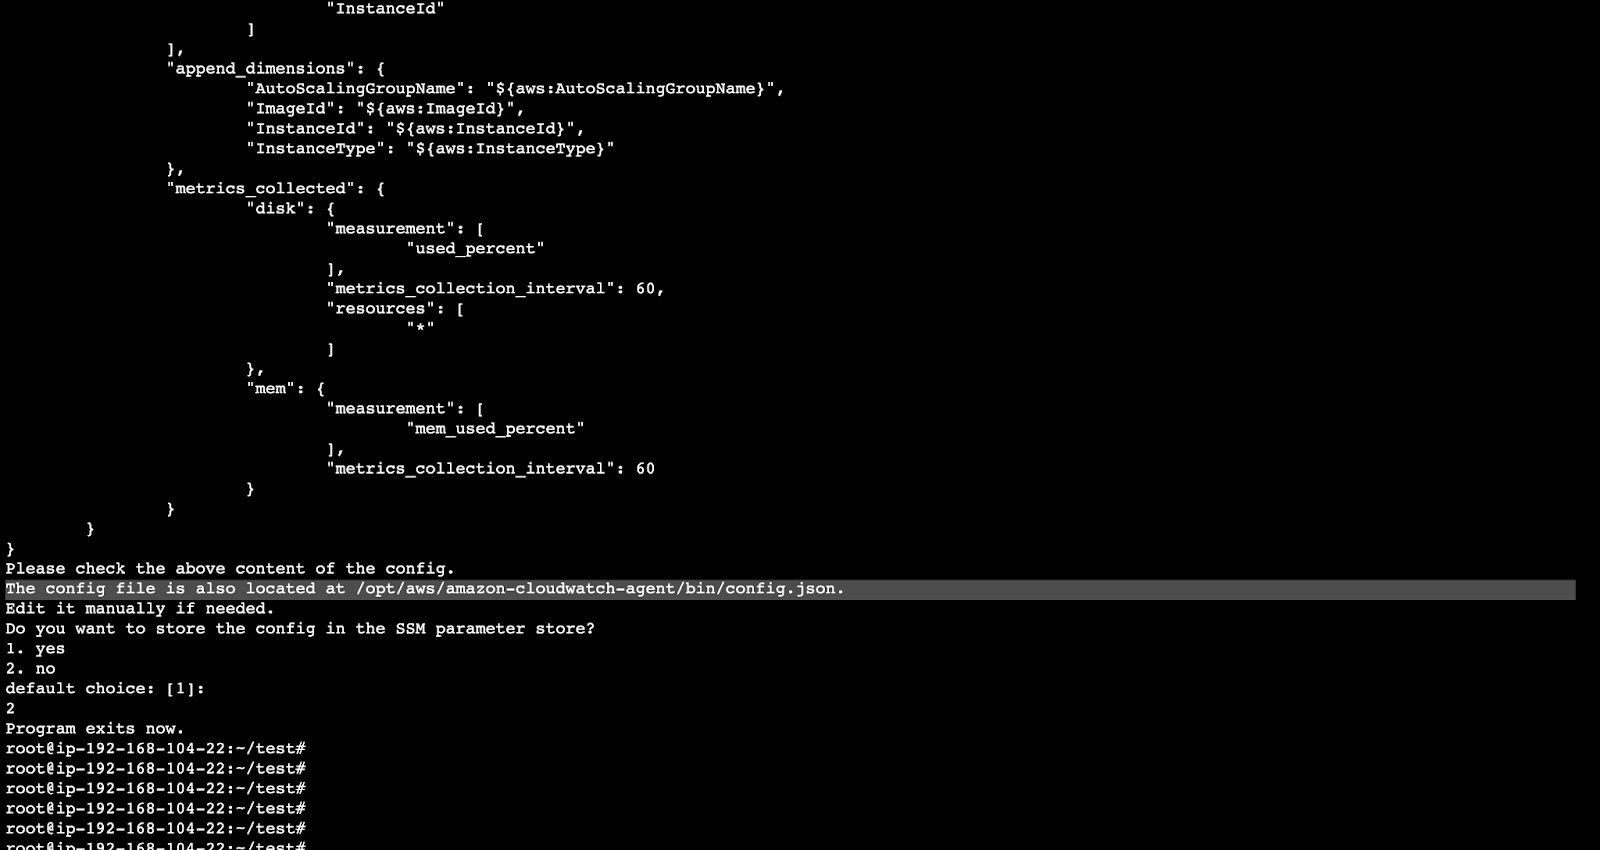
Provide the generated config.json file created by the wizard to the cloudwatch agent setup
Once we run the wizard, a config.json file is generated. This config file needs to be provided to the Cloudwatch agent. In response to this config file, the Cloudwatch agent creates a config.toml file automatically.
The config file is generated at /opt/aws/amazon-cloudwatch-agent/bin/ location.
Command
/opt/aws/amazon-cloudwatch-agent/bin/amazon-cloudwatch-agent-ctl -a fetch-config -m ec2 -s -c file:/opt/aws/amazon-cloudwatch-agent/bin/config.json
Step 8
Restart cloudwatch agent
/opt/aws/amazon-cloudwatch-agent/bin/amazon-cloudwatch-agent-ctl -m ec2 -a stop
/opt/aws/amazon-cloudwatch-agent/bin/amazon-cloudwatch-agent-ctl -m ec2 -a start
Step 9
Check logs in the cloudwatch service
Check the cloudwatch log groups tab. You can find the log group created. And also check the all metrics tab, you can see the cwAgent tab


Additional Docs
Summary
In this post we have seen how we can monitor log files and monitor memory utilization using Amazon Cloudwatch agent. First we created a role consisting of 2 policies. These policies provide permission for SSM and the Cloudwatch agent. Next we downloaded the Cloudwatch agent installation file and had it installed. Following that, we created the config.json file by running the Cloudwatch agent wizard. Next we provided the config.json file to the Cloudwatch agent. Lastly, we restarted the agent.
By: Shubham Kumar, DevSecOps Engineer (Cloud.in)

No comments:
Post a Comment